“DNS Server isn’t Responding” – How to fix this error in macOS and Windows
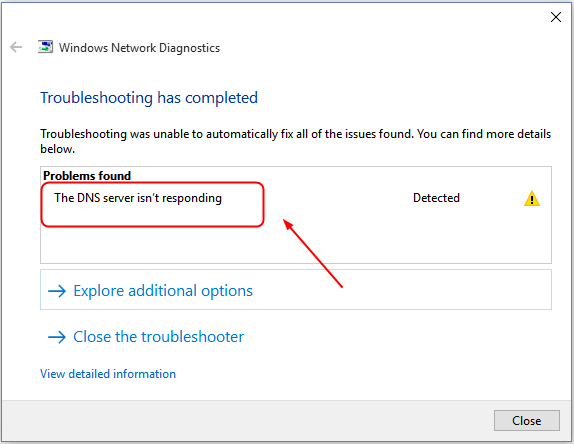
All over a sudden you’re unable to access websites from your computer. You go ahead and “troubleshoot network problems” on Windows, but you get in response that “DNS Server isn’t responding.” There’s a multitude of factors that might be causing this hitch. You are worried about what the problem might be. If or when this problem occurs, take it easy as the problem is solvable.
In fact, most of these issues take very simple resolutions to solve. It could be as simple as restarting your PC or changing internet browsers. Sometimes it can seem a bit complicated. Say, for instance, if you need to use public key authentication (you can check this out here) instead of a password for accessing a remote server, the SSH key login scheme might seem complex. However, with the right technical guide, you can get around things easily. Anyway, here this guide describes the message “DNS Server isn’t responding.” implies. It also takes you through the process/steps that you should follow to fix errors in Windows or macOS.
What’s the meaning of “DNS Server isn’t responding?”
In a computer system, the DNS covers the computer naming system used to handle alphanumeric domain tags, also referred to as ‘hostnames’, and then converts them to numeric IP addresses. In other words, DNS servers are used as translators.
Let’s look at it this way; upon inputting an internet address into the browser, it’s then relayed to the DNS from the router, where the address is dissolved and remitted information of IP addresses. Nevertheless, where the DNS server fails to appropriately complete the name resolution procedure, the response is often a message that shows the DNS server isn’t responding. The “DNS Server isn’t responding” message implies that the browser cannot establish the link to the web.
Most times, DNS problems result from errors at the end of the user; either as an issue with the internet or network connection, DNS settings being misconfigured, or where the browser is out-of-date. Whenever you receive an error message when you try to connect to the internet, contact your service provider, for a solution. If the problem persists, you may need to contact the best rural internet provider (or based on your location) for a new internet connection. That said, you can resolve the issue by switching between browsers, flushing the DNS cache, disabling connections, and changing DNS servers.
How do you fix DNS errors?
In insomuch as you know what the message implies and are much conversant with various potential causes, let’s go through some of the resolution ways. In this post, we’ll discuss various methods of fixing the “DNS Server isn’t responding” on your computer system.
Also read : Best Git GUI for Windows and Mac
#1. Switching between browsers
Here, you can test the connection of DNS by troubleshooting the problem. Yes, fixing the whole issue may be as easy as just switching the internet browser. To execute this requires you to access the internet using another browser. Suppose that you’ve been using Google Chrome as your preferred browser, this time you can use Mozilla Firefox to access the same website.
If switching the browser makes your search successful, then you will most probably need to update Google Chrome to the newest version. Alternatively, uninstall your default browser and install it again. Nevertheless, If the same problem persists, then it’s not your browser causing the problem, it’s another source.
#2. Safe Mode start
This is often used where your computer OS is malfunctioning, and the system responds with the “DNS Server isn’t Responding” message. Now, you need to boot your system while the computer is in safe mode for checking whether the problem is solvable. This reduces the resources required for operating Windows and it might be a helpful method to solving the problem.
Supposing that you’re using a Windows 10 Operating System, this is how you start your PC during safe mode. The first step is to press the Windows key, then navigate to the power symbol. While holding the shift button, click the restart option. A new window appears, select the Troubleshoot > Advanced Option. Check the advanced options category, click on Startup Settings then select Restart. Select 4-button. That way, the computer restarts under Safe Mode.
Supposing that you’re using a Windows 7 Operating System, this is how you start your computer under safe mode. Go to Power then to Restart. While the computer is booting up, press and hold worn the F8 button. The same procedure applies to macOS computers. You are supposed to hold down the Shift button while your macOS PC is booting. Release the key when the Apple emblem shows up on the screen. The computer starts under Safe Mode. In this Safe Mode, visit the website one more time. If there are no network connection problems, then the issue might be a result of programs like antivirus software.


#3. Disable your Firewall and any antivirus app
If switching from Google Chrome to Mozilla Firefox doesn’t help, consider deactivating the firewall for some time. Firewalls and antivirus programs safeguard the device from malware and viruses. Nevertheless, other times, they interfere with your device’s network connection.
Windows OS users can temporarily deactivate anti-malware programs by opening the control panel, then opening Update and Security, selecting Windows Security, clicking on Virus Protection, and then selecting Manage Settings.
On the other hand, macOS users can open System Preferences, click on Security and Privacy, and select Firewall. Now that you’ve deactivated the firewall and related software, revisit the website from the browser. If the “DNS Server isn’t responding.” message doesn’t appear, consider switching the antimalware software or reshuffling the software settings. Whatever method you choose, in the end, don’t forget to reactivate the firewall.


#4. Disabling secondary Connections
Supposing that trick #3 doesn’t work for you, disabling secondary connection (if any) can help. Ensure that you’re operating on only an active connection.
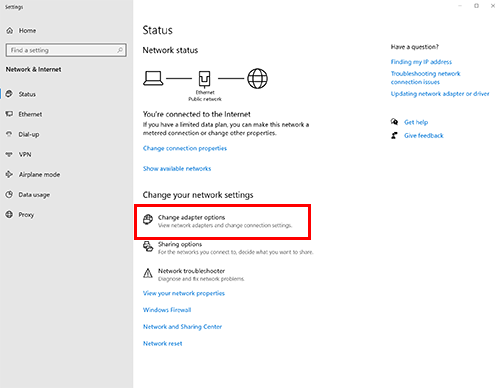
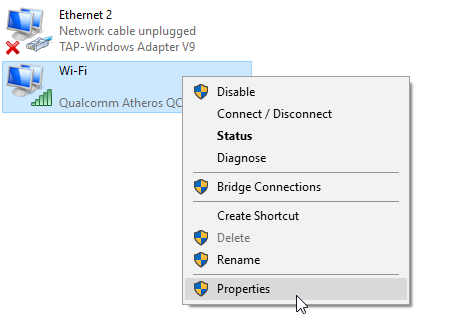
If you’re a Windows user, in the search bar of the PC’s taskbar, type “Network Connections” then select View network connections. Now, you will see several options under Network Connections appearing. You will notice that any connection(s) that you are not connected to bears Xs, red in color. On these connections, after right-clicking on them, choose Disable. Afterward, you can restart the browser and revisit the website one more time.
For macOS users, you can execute this process by double-tapping on the emblem, going through System Preference, and then Network. Check all the connections that your PC is connected to. Disabling these connections requires you to select on them and click the sign (–).

#5. Disconnecting/disabling the P2P functionality of Windows
P2P stands to Peer to Peer. If you’re a Windows user and disconnecting all secondary connections or antimalware software has not solved the “DNS Server isn’t Responding” problem, there are several other ways that you can follow.
Unfortunately, the P2P feature is only for Windows 10. Essentially, P2P assists the device to preserve its download bandwidth. Practically, the feature allows the user to download Windows Update once, then use their PC to share this updated version in different devices that are included in their local network. However, the Peer-2-Peer sometimes interferes with DNS processes. It is, therefore, worth disabling P2P to check whether this solves the problem you are facing at the moment.
To implement this process, tap on the Windows emblem, then choose Settings and click on Update and Security. A new page appears. Click on Delivery Optimization. Besides the option reading ‘Permit downloads from different computers and slide the switch off disabling it. Afterward, restart the PC and revisit the website one more time. If it works, well and good. If it doesn’t, don’t worry too much, there are more solutions for this.


#6. Restarting the Router
This is a simple way of solving the “DNS Server isn’t Responding” error message. Essentially, restarting the router flushes its cache and is a potential solution for solving the problem.
The majority of modern modems feature power buttons to allow you to instantly switch them on and off. One minute or two after you’ve switched off the modem, switch it on and give it some time to re-configure the connection. Afterward, try again to visit the website to check whether the connection has been reinstalled.
However, simply restarting your modem doesn’t guarantee the reinstatement of your device’s network. You may be required to reboot its entire system by unplugging from the power socket, wait for some time before reconnecting it to the power source. After restarting your router, you can check your upload vs download speeds to see if your internet is operating normally.
#7. Installing your PC with an up-to-date Drivers for Network Adapter
“DNS Server isn’t responding” error message might be a result of an old or out-of-date driver for the network adapter. In that case, you need to get a newer one or update the current one that you’ve installed on your PC.
Updating the driver can be done in several ways. Firstly, execute the whole process manually and this should only be done by a person who is fully aware of how drivers work. Alternatively, it as well is executed by applying an automatic tool like a Snappy Driver Installer (SDI). The implementation allows automatic recognition of the system and the proper drivers’ location to use.
This process is highly recommended because it limits the risks of committing human errors, like installing an inappropriate driver on the PC. Once you’ve downloaded the SDI and installed the up-to-date drivers, you can now restart the computer. Reconnect it to the web. Find whether the method resolves the problem.


#8. Flushing the DNS Cache then Resetting the IP
You’ve switched between different browsers, temporarily disabled the antimalware application, restart your modem, and disabled all the secondary connections but you’re still facing the same issue, turn your eye on the DNS settings. Like you’re required to clear cache in your router, you may be required to as much as the DNS before reconnecting it to the web, or maybe the IP requires resetting.
For Windows users, begin by typing the “cmd” command in the search bar of the PC taskbar, then select Command Prompt. A new page opens, without quotations, insert “ipconfig/flushdns’ ‘ then press Enter on the keyboard. After completing the process, a window opens displaying a message to show you that the system has successfully flushed the DNS cache.
To flush DNS cache on macOS devices, the user is required to open the Terminal app by pressing the Command and Space buttons and enter the Word Terminal into the Spotlight. Afterward, they should enter “dscacheutil –flushcache” into the terminal app page. Finally, hit the Enter button. On the macOS device, there is no congratulatory message (the process was completed successfully) as it is when using Windows devices but the DNS cache is flushed after the command is successfully executed.
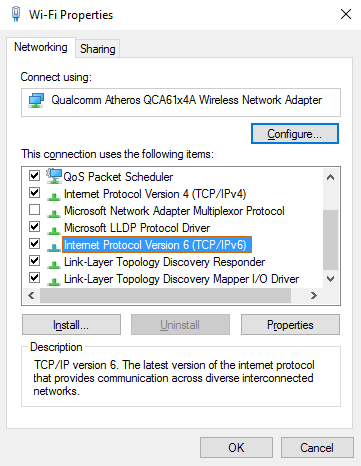
#9. Deactivate IPv6
IPv6 is linked to the “DNS Server isn’t responding” error message that you might be currently facing. So, disabling IPv6 is a possible solution. Windows users can navigate through Network Connections and select their current connection (without the red X sign). By right-clicking their current connection, choose Properties. Navigate through Networking and scroll down to option “IPv6” and select it. In case the option was selected, unmarked the box and select OK.
From there, refresh the browser then reconnect to the web. For a cable-less connection, deactivating IPv6 requires the use of the “network setup -setv6off Wi-Fi” command whereas Ethernet connection requires the use of “network setup -setv6off Ethernet” command. To complete the process, press the Enter button and then refresh the browser.
#10. Changing your Default DNS Server
This is for Windows users and it’s compatible with Windows 7, Windows 8, and Windows 10. To begin, tapping the Windows Emblem on your screen. Type “Network Connection” on the search bar and choose the option “View network connections“. A new page appears select internet adapter currently in use, right-tap on it, and properties. Select “IPv4” in the window that appears. Choose the option “Use the following DNS server addresses” then enter an address of the alternative server.
For macOS users, click on the Apple emblem and choose ‘System Preferences.’ Choose the Network symbol, select your present network and left-tap on the ‘Advanced’ button. Below the DNS tab, select the (+) button and press enter. Finally, select OK then Apply. From there, restart your browser and revisit the website. Your problem will have been solved.


In conclusion, the ten points are very helpful in resolving the “DNS Server isn’t responding.” error message. More importantly, they are easy to execute with minimal processes and significant impact.